This article will show agenda managers how to access and edit Meeting Templates, including step-by-step instructions on how to add, edit, and delete agenda sections and standing items.
The ability to access and edit Meeting Templates is helpful for municipalities that need to make changes to all future meetings of a specific meeting type. For example, some municipalities list their current council and the staff members who attend meetings at the top of their agendas. In this case, an agenda manager might need to update this information in their meeting templates following an election.
Important Notes:
To access, edit, or work with your meeting templates, your interface must include a Meeting Template button in the left menu. If you don't see that button, you can contact Support and request the Meeting Templates permission which will add the Meeting Template option to your screen.
Please note that in order to add new meeting bodies, you must contact either your Customer Success Manager or the Support Team.
If you are updating meeting templates because your elected officials have changed, you must remember to also update your council list within the Meeting Settings section of Application Properties. See the Add a Legislator to a Meeting Type section of our Add and Manage Users article for instructions on how to add a legislator to a specific meeting type.
We recommend that you do not make any changes to the section or item formatting for your agenda or your minutes. The formatting for your meeting templates was established and coded during implementation, and attempts to manually replicate or modify that formatting may lead to unexpected results in your documents.
If you have already created future meetings and want them to use an updated meeting template, you will need to delete and recreate the existing future meetings to apply the updated template.
If a newly created meeting type does not appear in the Meeting Type list when creating a meeting, check the permissions assigned to the relevant user roles. Users must have the appropriate permissions for the new meeting type to create meetings and perform the actions associated with that type. Review the user roles and ensure they are enabled for the new meeting type, then try creating the meeting again.
Access a Meeting Template
Sign in to your Agenda and Meeting Management Essential solution if you have not already
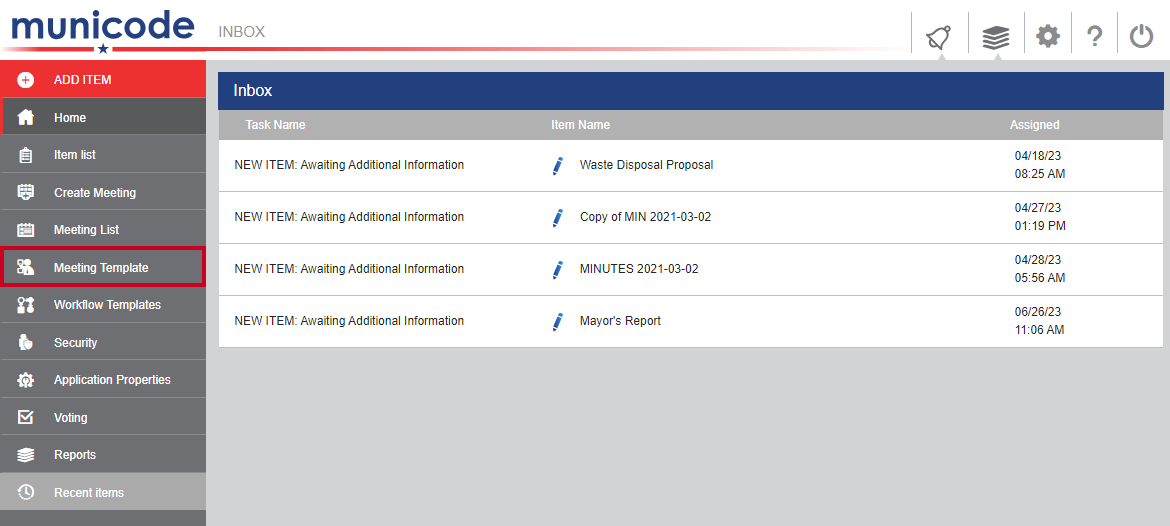
Click the Meeting Template option in the left menu
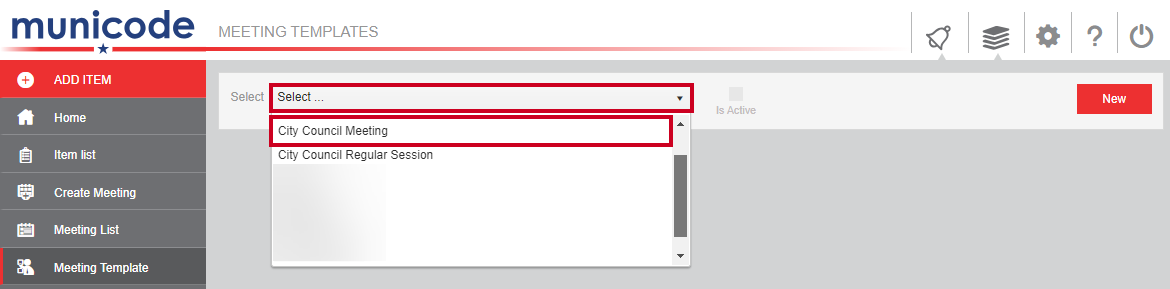
Click the Select drop-down menu and choose the desired template from the list
View the meeting template's details
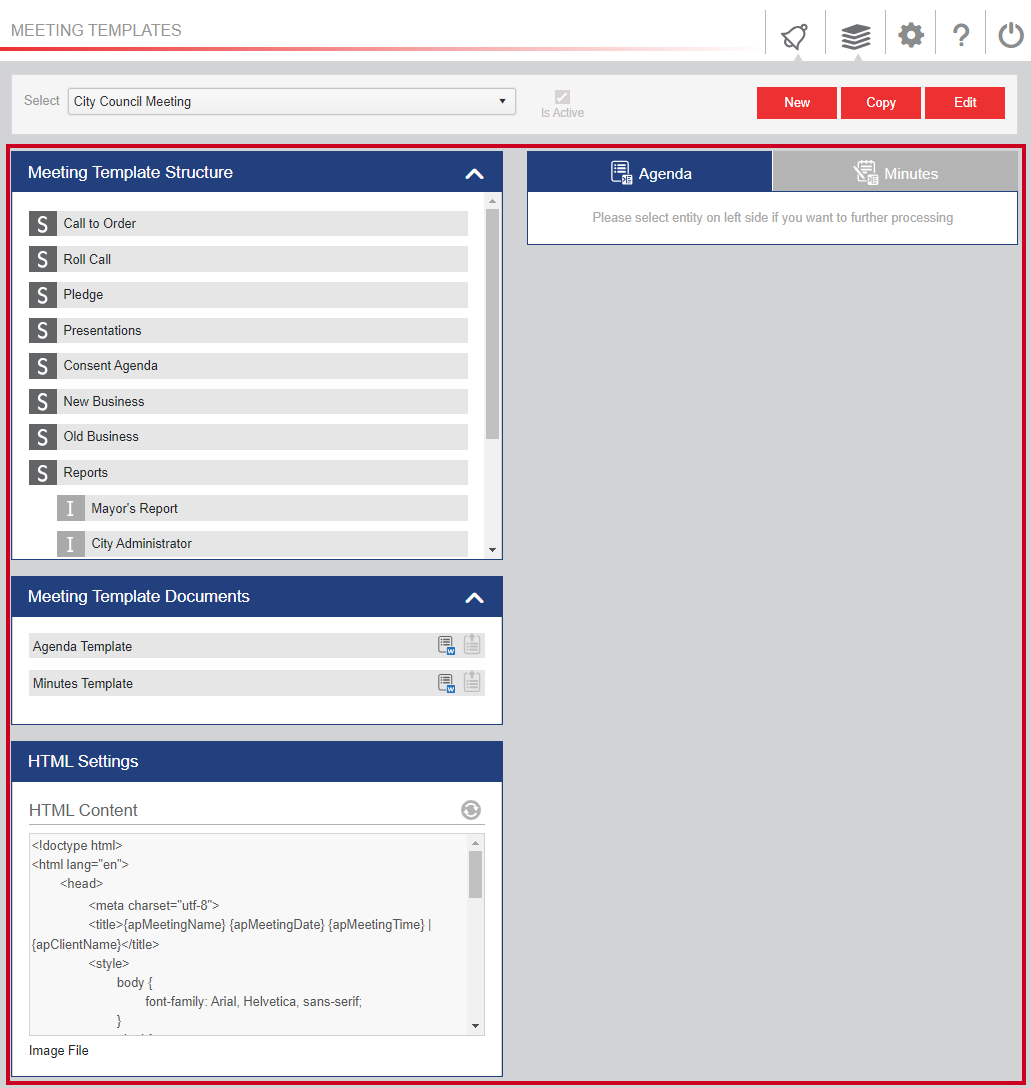
Meeting Template Structure: The sections and standing items that comprise the structure of the meeting template; the Meeting Template Structure that appears here will also appear on the Meeting Detail screen's Build tab
Meeting Template Documents: Meeting-template Microsoft Word documents that set the look and feel of the Word and PDF versions of the agendas and packets for this meeting type
HTML Settings: The code in this section sets the look and feel of HTML agendas and packets for this meeting type
Agenda tab: You can click a section or item in the Meeting Template Structure to populate this area with a preview of how the selection will appear on all agendas that use this template; if a section is selected, this tab will also show how the section and any of its standing items will be formatted on agendas that use the template
Minutes tab: You can click a section in the Meeting Template Structure to populate this area with the formatting that will be used for the section and any of its standing items within minutes documents that use the template
Manage Meeting Template Sections
Add a Section to a Meeting Template
Important Notes:
Although there is a New button on the Meeting Templates page, please contact either your Customer Success Manager or the Support Team to assist in the addition of any meeting bodies.
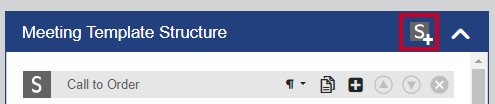
Although there is an Add Section button (capital S and plus-sign icon) in the Meeting Template Structure header, we do not recommend that you use it. Instead, we recommend that you follow these instructions to copy an existing section rather than adding a new one from scratch. This is because the formatting for your meeting templates was established and coded during implementation, and attempts to manually replicate that formatting may lead to unexpected results in your documents.
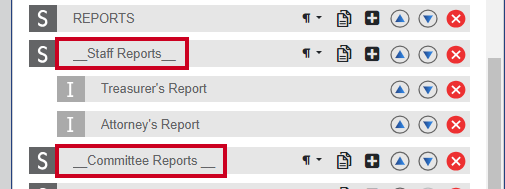
Some municipalities use subsections to indicate that certain section headers should fall below the section header immediately above it within an agenda. Subsections are most often represented by underscores (_) before and after the section name. Subsections typically have special formatting such as additional indentation that does not apply to regular sections. If your municipality uses subsections, be sure to pay close attention to whether you are duplicating a section or subsection so that the appropriate formatting is applied.
Add a Section to a Meeting Template Instructions
Sign in to your agenda and meeting management solution if you have not already
Click the Edit button to make changes to the template

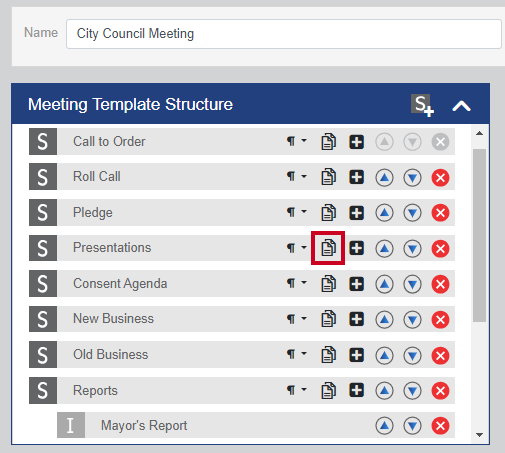
Click the Duplicate Section button (two sheets of paper icon) next to a section within the Meeting Template Structure that has formatting similar to what you want in the new section
Notes:
Although there is an Add Section button (capital S and plus-sign icon) in the Meeting Template Structure header, we do not recommend that you use it. Instead, we recommend that you follow these instructions to copy an existing section rather than adding a new one from scratch. This is because the formatting for your meeting templates was established and coded during implementation, and attempts to manually replicate that formatting may lead to unexpected results in your documents.
Some municipalities use subsections to indicate that certain section headers should fall below the section header immediately above it within an agenda. Subsections are most often represented by underscores (_) before and after the section name. Subsections typically have special formatting such as additional indentation that does not apply to regular sections. If your municipality uses subsections, be sure to pay close attention to whether you are duplicating a section or subsection so that the appropriate formatting is applied.
The duplicated section will appear at the bottom of the Meeting Template Structure list with the name "Copy of [duplicated section]"
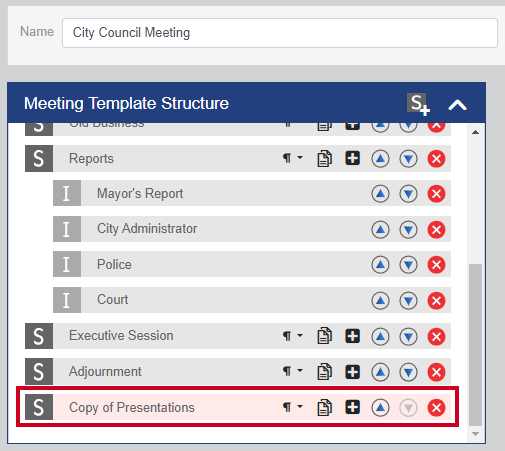
Click the name of the duplicated section to edit its current section name, if desired

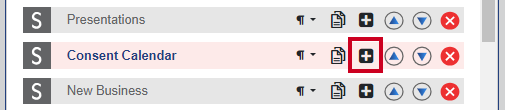
Click the Add Standing Item button to add a standing item to the section, if desired
Click the Up and Down buttons (up and down arrow icons) to move the section into the desired location within the Meeting Template Structure, if necessary
Note:
If you move a section up or down, any standing items that fall under it will not move up or down with the section. If applicable, you will need to move each standing item into place manually.
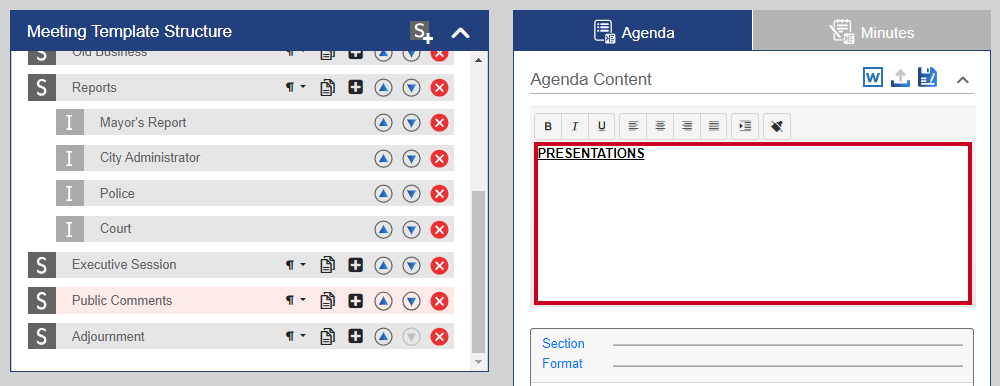
Enter or edit the text you wish to appear for this section on the agenda in the Agenda text box as desired
Note:
Because your new section was copied from an existing one, the Agenda Content box will be auto-filled with any text that appears in the Agenda Content box for the duplicated section. At a minimum, you will want to update the duplicated section name if it is included in the Agenda Content box.
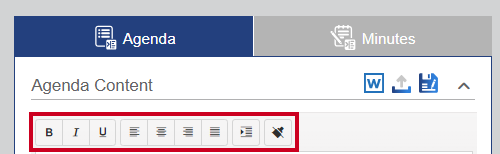
Use the Text and Paragraph Formatting tools to format the look of the agenda content, if desired
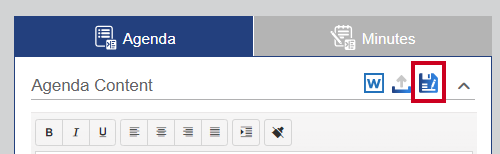
Click the Save button (floppy disk icon) to save changes to the section's agenda content
If additional formatting is desired, you can edit the Agenda Content field with Word snippets:
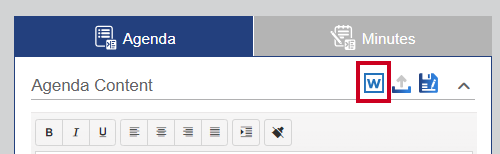
Click the Download button (Microsoft Word icon) to download the section's agenda content as a Word document, if desired
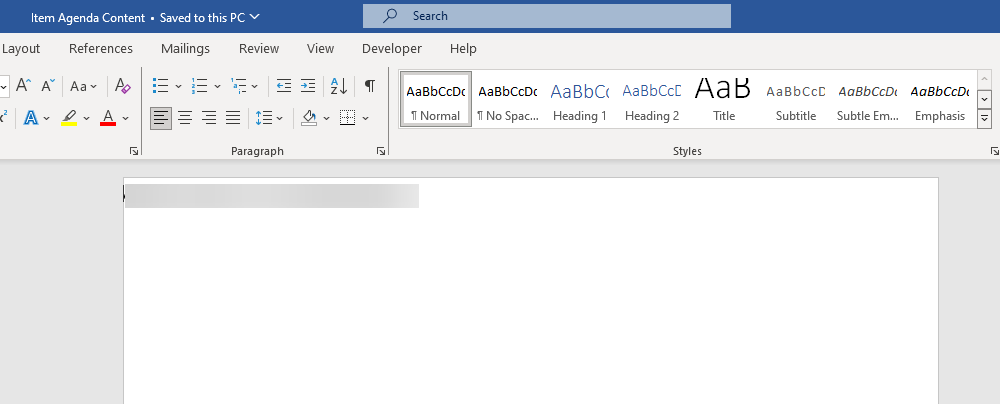
Open the downloaded Word document, edit or add your text as desired, then save your changes
Note:
The display of this Word document may look unusual to you. There are no margins surrounding the text and no ruler across the top or sides of the screen.
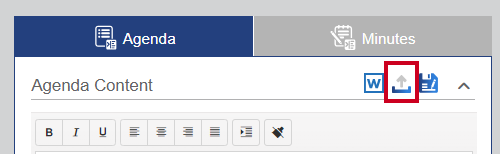
Within Agenda and Meeting Management Essential, click the Upload button (up arrow and tray icon) to upload the section's agenda content as a Word document, if desired
Note:
Do not click the red Update button below the Agenda Content text box.
Click the Update button to save your changes to the meeting template

The new section will appear on future agendas and minutes that use the updated meeting template
Note:
If you have already created future meetings and want them to use your updated meeting template, you will need to delete and recreate the existing future meetings to apply the updated template.
Edit a Meeting Template Section
Important Notes:
Although there is a New button on the Meeting Templates page, please contact either your Customer Success Manager or the Support Team to assist in the addition of any meeting bodies.
Although there is an Add Section button (capital S and plus-sign icon) in the Meeting Template Structure header, we do not recommend that you use it. Instead, we recommend that you follow the Add a Section to a Meeting Template instructions to copy an existing section rather than adding a new one from scratch. This is because the formatting for your meeting templates was established and coded during implementation, and attempts to manually replicate that formatting may lead to unexpected results in your documents.
Some municipalities use subsections to indicate that certain section headers should fall below the section header immediately above it within an agenda. Subsections are most often represented by underscores (_) before and after the section name. Subsections typically have special formatting such as additional indentation that does not apply to regular sections. If your municipality uses subsections, be sure to pay close attention to whether you are duplicating a section or subsection so that the appropriate formatting is applied.
Edit a Meeting Template Section Instructions
Sign in to your agenda and meeting management solution if you have not already
Click the Edit button to make changes to the template
Click the section you wish to update within the Meeting Template Structure pane
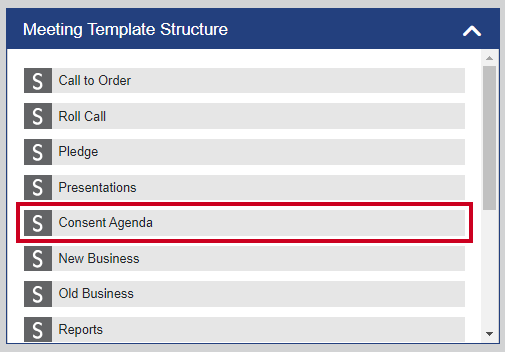
Edit the section name, if desired
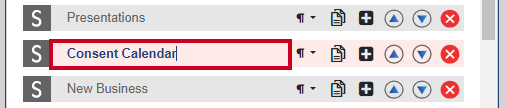
Click the Add Standing Item button to add a standing item to the section, if desired
Click the Up and Down arrow icons to move a section or item higher or lower on the agenda, one place at a time, if desired
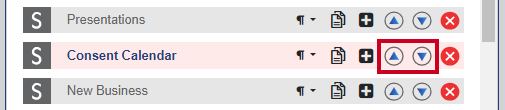
Note:
If you move a section up or down, any standing items that fall under it will not move up or down with the section. If applicable, you will need to move each standing item into place manually.
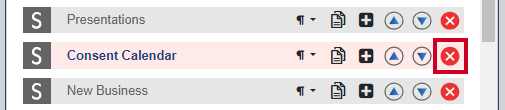
Click the Delete button (circle and X icon) next to a section to delete it from the meeting template, if desired
Enter or edit the text you wish to appear for this section on the agenda in the Agenda Content text box as desired
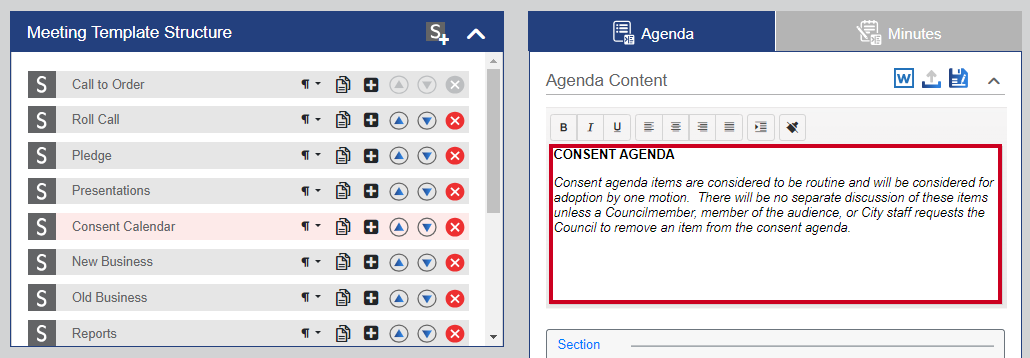
Use the Text and Paragraph formatting tools to format the look of the agenda content, if desired
Click the Save button (floppy disk icon) to save all changes to the Agenda Content section
If additional formatting is desired, you can edit the Agenda Content field with Word snippets:
Click the Download button (Microsoft Word icon) to download the section's agenda content as a Word document, if desired
Open the downloaded Word document, edit or add your text as desired, then save your changes
Note:
The display of this Word document may look unusual to you. There are no margins surrounding the text and no ruler across the top or sides of the screen.
Click the Upload button (up arrow and tray icon) to upload the section's agenda content as a Word document, if desired
Note:
Do not click the red Update button below the Agenda Content text box.
Click the Update button above the Minutes tab to save your changes to the meeting template
The edited meeting template section will appear on future agendas and minutes that use the updated meeting template
Note:
If you have already created future meetings and want them to use your updated meeting template, you will need to delete and recreate the existing future meetings to apply the updated template.
Delete a Section from a Meeting Template
Important Notes:
Although there is a New button on the Meeting Templates page, please contact either your Customer Success Manager or the Support Team to assist in the addition of any meeting bodies.
Although there is an Add Section button (capital S and plus-sign icon) in the Meeting Template Structure header, we do not recommend that you use it. Instead, we recommend that you follow the Add a Section to a Meeting Template instructions to copy an existing section rather than adding a new one from scratch. This is because the formatting for your meeting templates was established and coded during implementation, and attempts to manually replicate that formatting may lead to unexpected results in your documents.
Some municipalities use subsections to indicate that certain section headers should fall below the section header immediately above it within an agenda. Subsections are most often represented by underscores (_) before and after the section name. Subsections typically have special formatting such as additional indentation that does not apply to regular sections. If your municipality uses subsections, be sure to pay close attention to whether you are duplicating a section or subsection so that the appropriate formatting is applied.
Delete a Section from a Meeting Template Instructions
Sign in to your agenda and meeting management solution if you have not already
Click the Edit button to make changes to the template
Within the Meeting Template Structure section, locate the section you wish to remove
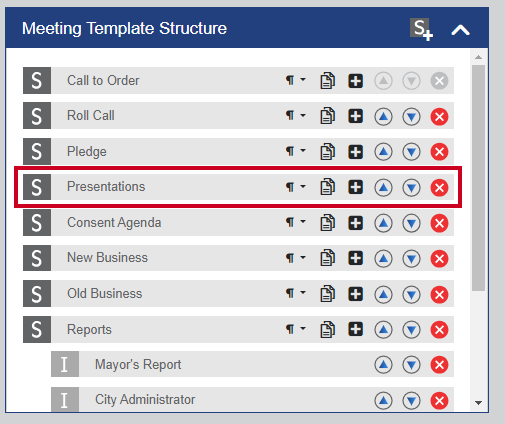
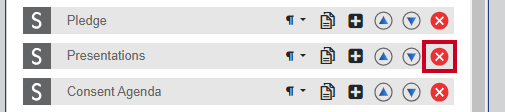
Click the Delete button to the right of the name of the section
Click the Update button to update the meeting template
The deleted meeting template section will no longer appear on future agendas and minutes that use the updated meeting template
Note:
If you have already created future meetings and want them to use your updated meeting template, you will need to delete and recreate the existing future meetings to apply the updated template.
Manage Meeting Template Standing Items
Add a Standing Item to a Meeting Template
Important Note:
By default, standing items do not automatically enter the workflow for their given meeting type. Because standing items are created along with the agenda by the system, workflow rules do not apply to them. However, if necessary, users with Workflow Commands permissions can start a workflow for a standing item from its Item Detail screen.
Add a Standing Item to a Meeting Template Instructions
Sign in to your agenda and meeting management solution if you have not already
Click the Edit button to make changes to the template
Click the Add Standing Item button (plus-sign icon) next to the section in which you want to add the standing item
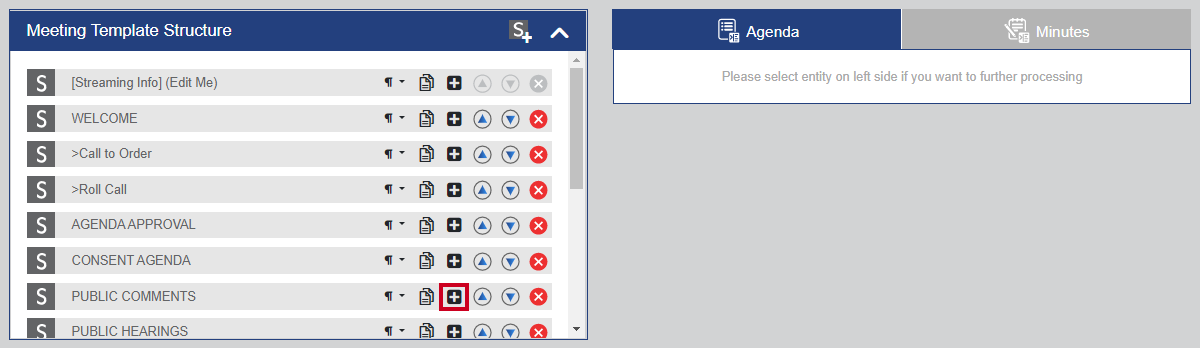
The standing item will appear directly below the name of the selected section
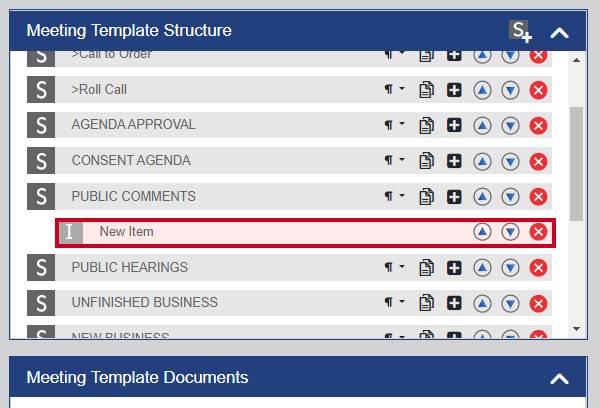
Click the name of the standing item to rename it, if desired

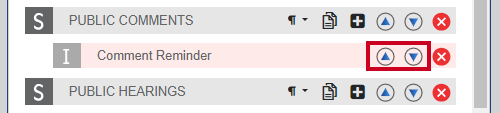
If the new standing item is one of multiple for the selected section (not pictured), you can click the Up and Down buttons (the up and down arrow icons) to move it into the desired location within the Meeting Template Structure
Note:
Pay close attention when you use the Up and Down buttons for standing items. Because standing items are not tied to a particular section within the Meeting Template Structure, you could accidentally move the standing item under the wrong section if you are not careful.
Enter the text you wish to appear for this item on the agenda in the Agenda Content text box as desired
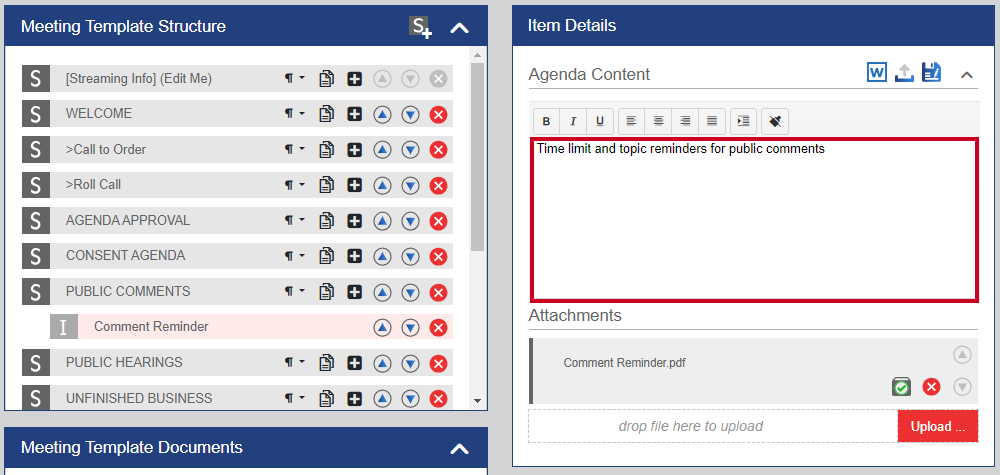
Use the Text and Paragraph Formatting tools to format the look of the agenda content, if desired
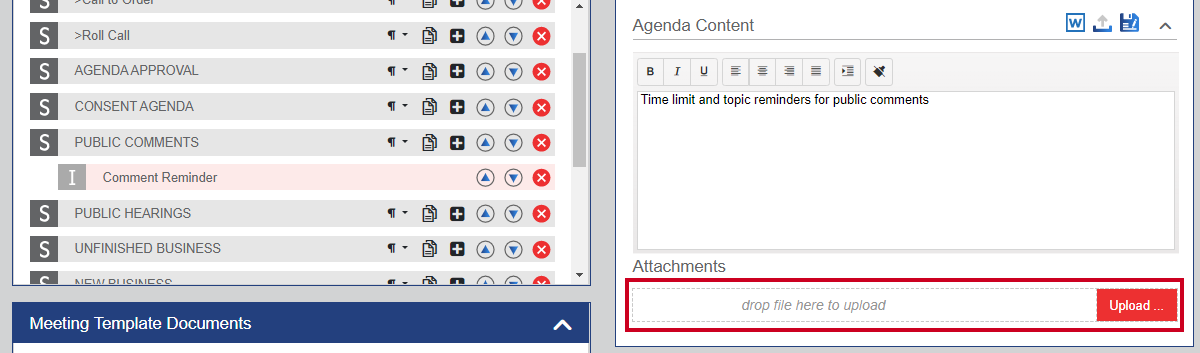
Drag and drop a file onto the drop file here to upload field, or click the Upload button and select a file to add an attachment to the standing item, if desired
Click the attachment options icons to edit, delete, or rearrange any standing item attachments as needed

Include in/Exclude from Packet(s) (plus/minus icon or box with a check/X/keyhole/people icon): Click to indicate whether the standing item should be included in or excluded from its assigned/associated agenda packet; all standing items are set to be included in the packet by default
Note:
The display of these icons will differ depending on your organization's settings. If your organization only uses public packets, you will see a plus to include the item in the packet or a minus to exclude the item from the packet. If your organization uses both public and private/confidential packets, the icon can appear in four different ways.
Included in All Packets (box with a check mark): This icon indicates that the item will be included in both the public and private/confidential versions of the packet
Excluded from All Packets (box with an X): This icon indicates that the item will not be included in any packet
Included in Private Packet Only (box with a keyhole): This icon indicates that the item will be included in the private packet but not the public packet
Included in Public Packet Only (box with people): This icon indicates that the item will be included in the public packet but not in the private packet
Delete Document (circle and X icon): Click to delete the attachment
Move Up/Move Down (up/down arrow icon): Click to rearrange the placement of attachments by moving an attachment one place higher or lower in the list; attachments will appear on the agenda in the same order that they appear on the screen
Click the Save button (floppy disk icon) to save all changes to the Agenda Content section
If additional formatting is desired, you can edit the Agenda Content field with Word snippets:
Click the Download button (Microsoft Word icon) to download the standing item's agenda content as a Word document, if desired
Open the downloaded Word document, edit or add your text as desired, then save your changes
Note:
The display of this Word document may look unusual to you. There are no margins surrounding the text and no ruler across the top or sides of the screen.
Click the Upload button (up arrow and tray icon) to upload the standing item's agenda content as a Word document, if desired
Note:
Do not click the red Update button below the Agenda Content text box.
Click the Update button to save your changes to the Meeting Template
The new standing item will appear on future agendas and minutes that use the updated meeting template
Note:
If you have already created future meetings and want them to use your updated meeting template, you will need to delete and recreate the existing future meetings to apply the updated template.
Edit a Meeting Template Standing Item
Important Note
By default, standing items do not automatically enter the workflow for their given meeting type. Because standing items are created along with the agenda by the system, workflow rules do not apply to them. However, if necessary, users with Workflow Commands permissions can start a workflow for a standing item from its Item Detail screen.
Edit a Meeting Template Standing Item Instructions
Sign in to your agenda and meeting management solution if you have not already
Click the Edit button to make changes to the template
Within the Meeting Template Structure, locate the standing item you wish to edit
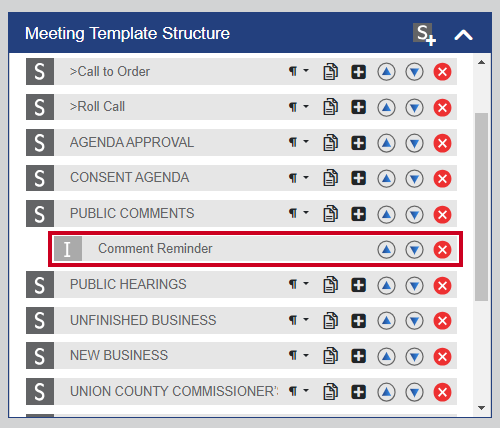
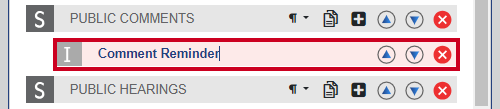
Click the name of the standing item to edit its name, if desired
Click the Up and Down buttons (the up and down arrow icons) to change the order in which the standing item appears within its section, or move the standing item further up or down to change the section in which it falls within the Meeting Template Structure
Enter or edit the text you wish to appear for this standing item on the agenda in the Agenda Content text box as desired
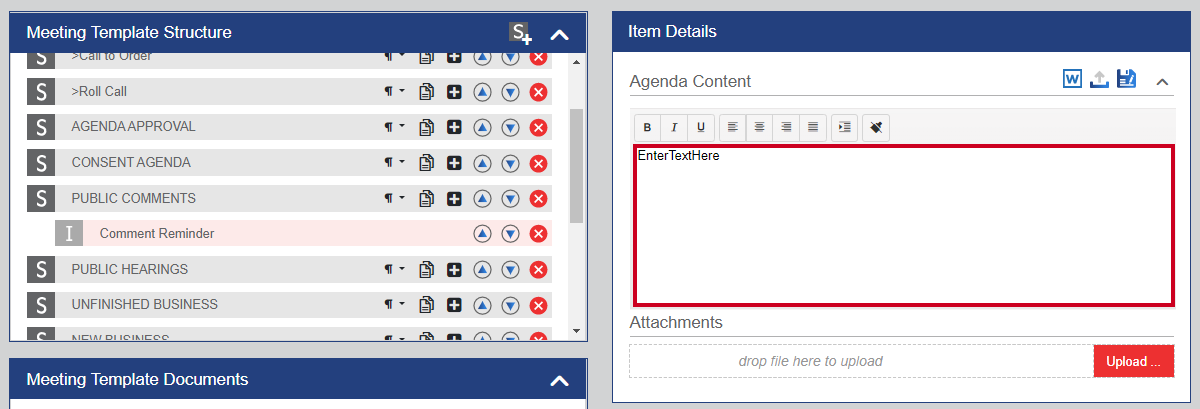
Use the Text and Paragraph Formatting tools to format the look of the agenda content, if desired
Click the attachment options icons to edit, delete, or rearrange any existing attachments to the standing item as needed
Include in/Exclude from Packet(s) (plus/minus icon or box with a check/X/keyhole/people icon): Click to indicate whether the standing item should be included in or excluded from its assigned/associated agenda packet; all standing items are set to be included in the packet by default
Note:
The display of these icons will differ depending on your organization's settings. If your organization only uses public packets, you will see a plus to include the item in the packet or a minus to exclude the item from the packet. If your organization uses both public and private/confidential packets, the icon can appear in four different ways.
Included in All Packets (box with a check mark): This icon indicates that the item will be included in both the public and private/confidential versions of the packet
Excluded from All Packets (box with an X): This icon indicates that the item will not be included in any packet
Included in Private Packet Only (box with a keyhole): This icon indicates that the item will be included in the private packet but not the public packet
Included in Public Packet Only (box with people): This icon indicates that the item will be included in the public packet but not in the private packet
Delete Document (circle and X icon): Click to delete the attachment
Move Up/Move Down (up/down arrow icon): Click to rearrange the placement of attachments by moving an attachment one place higher or lower in the list; attachments will appear on the agenda in the same order that they appear on the screen
Drag and drop a file onto the drop file here to upload field, or click the Upload button and select a file to upload an attachment to the standing item, if desired

Click the Save button (floppy disk icon) to save all changes to the Agenda Content section
If additional formatting is desired, you can edit the Agenda Content field with Word snippets:
Click the Download button (Microsoft Word icon) to download the standing item's agenda content as a Word document, if desired
Open the downloaded Word document, edit or add your text as desired, then save your changes
Note:
The display of this Word document may look unusual to you. There are no margins surrounding the text and no ruler across the top or sides of the screen.
Click the Upload button (up arrow and tray icon) to upload the standing item's agenda content as a Word document, if desired
Note:
Do not click the red Update button below the Agenda Content text box.
Click the Update button to save your changes to the meeting template
The standing item has been edited, and any changes that have been applied will appear on future agendas and minutes that use the updated meeting template
Note:
If you have already created future meetings and want them to use your updated meeting template, you will need to delete and recreate the existing future meetings to apply the updated template.
Delete a Standing Item from a Meeting Template
Sign in to your agenda and meeting management solution if you have not already
Click the Edit button to make changes to the template
Within the Meeting Template Structure section, locate the standing item you wish to remove
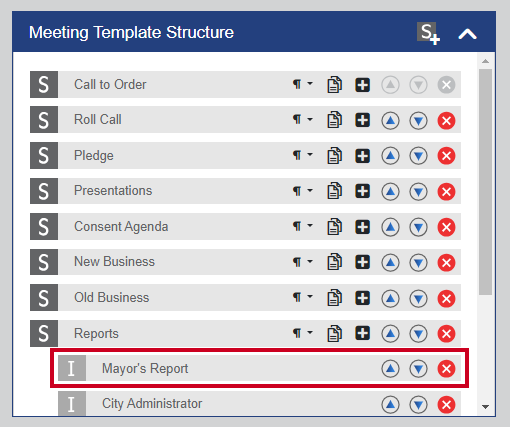
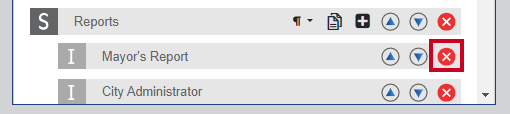
Click the Delete button to the right of the name of the standing item
Click the Update button to update the meeting template
The deleted standing item will no longer appear on future agendas and minutes that use the updated meeting template
Note:
If you have already created future meetings and want them to use your updated meeting template, you will need to delete and recreate the existing future meetings to apply the updated template.